This article was last updated on August 20, 2024, to add sections on Accessibility Considerations and Testing Toast Notifications.
Introduction
Building data-intensive enterprise web applications entails coalescing numerous features that have proven to be cumbersome to develop.
An effective notification system ensures proper feedback for changes throughout your application, effortlessly improving the user experience, which has become a hallmark for modern applications.
Javascript libraries like React simplify the difficulty of building data-intensive web applications with their innovative architecture and developer-friendly syntax in an ever-evolving ecosystem. There's only so much React can do to provide a foolproof solution for building these kinds of applications. This is where frameworks like Refine come into play.
Using a modular design, Refine leverages the best of what the React ecosystem has to offer, ranging from design systems to state management and notification libraries, to create a multipurpose React toolkit. This toolkit not only makes building enterprise-grade applications like admin panels, dashboards, and B2B applications a breeze but also provides built-in notification providers for centralized notification management.
In this article, we'll introduce Refine and explore how to set up a Refine application and create a custom notification provider using the react-hot-toast library.
Steps we'll cover:
- What is react-hot-toast
- What is Refine notification provider
- Create custom notification provider with react-hot-toast
- Accessibility Considerations
- Dismissing React Hot Toast Notifications
- Testing React Hot Toast Notifications
What is react-hot-toast

React-hot-toast is a lightweight and open-source notification library for React. Like other React toast libraries, this library is designed to mimic push notifications popularized by native operating systems, such as iOS and Android, in web applications.
The library provides a simple API for creating and displaying various types of notifications, including success, error, and loading messages in React or React-based frameworks like refine. With minimal setup requirements, you can easily incorporate a toast notification into your application using a component-based approach facilitated by the <Toaster /> component and the toast() function.
The <Toaster /> component and the toast() function are the primary building blocks of the react-hot-toast library. The <Toaster/> component creates a DOM element for rendering toast notifications and accepts several props and options that can be used to customize the appearance and behavior of the notifications. Below is the basic structure of the <Toaster /> component:
<Toaster
  position="top-center"
  reverseOrder={false}
  gutter={8}
  containerClassName=""
  containerStyle={{}}
  toastOptions={{
    // Define default options
    className: "",
    duration: 5000,
    style: {
      background: "#363636",
      color: "#fff",
    },
  }}
/>
The toast() function triggers a notification anywhere in your application. It accepts the toast message and an optional configuration object, also known as ToastOptions, as its second argument.
This object is used to configure and customize the appearance and type of the toast notification. If a configuration object is provided, it will overwrite the toastOptions object property on the <Toaster/> component.
The following example demonstrates how to invoke a toast notification with similar toastoptions as the previous example with the <Toaster/> component.
toast("Hello World", {
  className: "",
  duration: 799,
  style: {
    background: "#363636",
    color: "#fff",
  },
});
Alternatively, the toast function offers the option to chain methods that invoke specific notification types, such as success, error, loading, and custom.
Success;
toast.success("Successfully created!");

Error;
toast.error("This is an error!");

Loading;
toast.loading("Waiting...");

Custom;
toast.custom(<div>Hello World</div>);
Refer to the react-hot-toast documentation to learn more about the toast function.
What is Refine
Refine is an open-source, React-based framework that facilitates the development of enterprise web applications, such as admin panels, dashboards, and B2B applications. It is a feature-rich library that prioritizes simplicity by eliminating repetitive tasks for CRUD, routing, internalization, and networking.
Refine is innately agnostic, which allows for the seamless integration of the highlighted features with widely used design systems, data fetching, state management, and complex form management libraries such as Material Design, Ant Design, React Query, React Hook Form, and more.
Additionally, Refine's loosely coupled design allows for the seamless integration of various backend architectures, ranging from a simple REST API to complex headless CMSs and databases, including:
- Supabase
- AppWrite
- Strapi
- Airtable
- Hasura
The documentation provides detailed information about Refine and its architecture. You can start there to learn more about the Refine framework. However, in the section below, we will explore how to set up a Refine application from scratch.
Set up a Refine app
The Refine app Scaffolder is an efficient tool that allows you to create Refine app seamlessly in your browser.
You can choose the libraries and frameworks you want to work with, and the tool will generate a boilerplate code for you. Once you have completed these steps, you will be able to follow the on-screen instructions to create a Refine application tailored to your preference.
For this tutorial, we will use the following configurations:
- React platform: Vite
- UI framework: Headless
- Backend: REST API
- Authentication Provider: No Auth
- Do you want examples pages: Yes
After creating your project, give it a title or use the default title, and then build and download the Gzipped compressed file to your local computer.
Next, extract the downloaded compressed file using a zip file extractor and open the project in an IDE of your choice. Finally, run the following commands to install the project dependencies and start the development server.
// Install dependencies
npm install

// Start development server
npm run dev
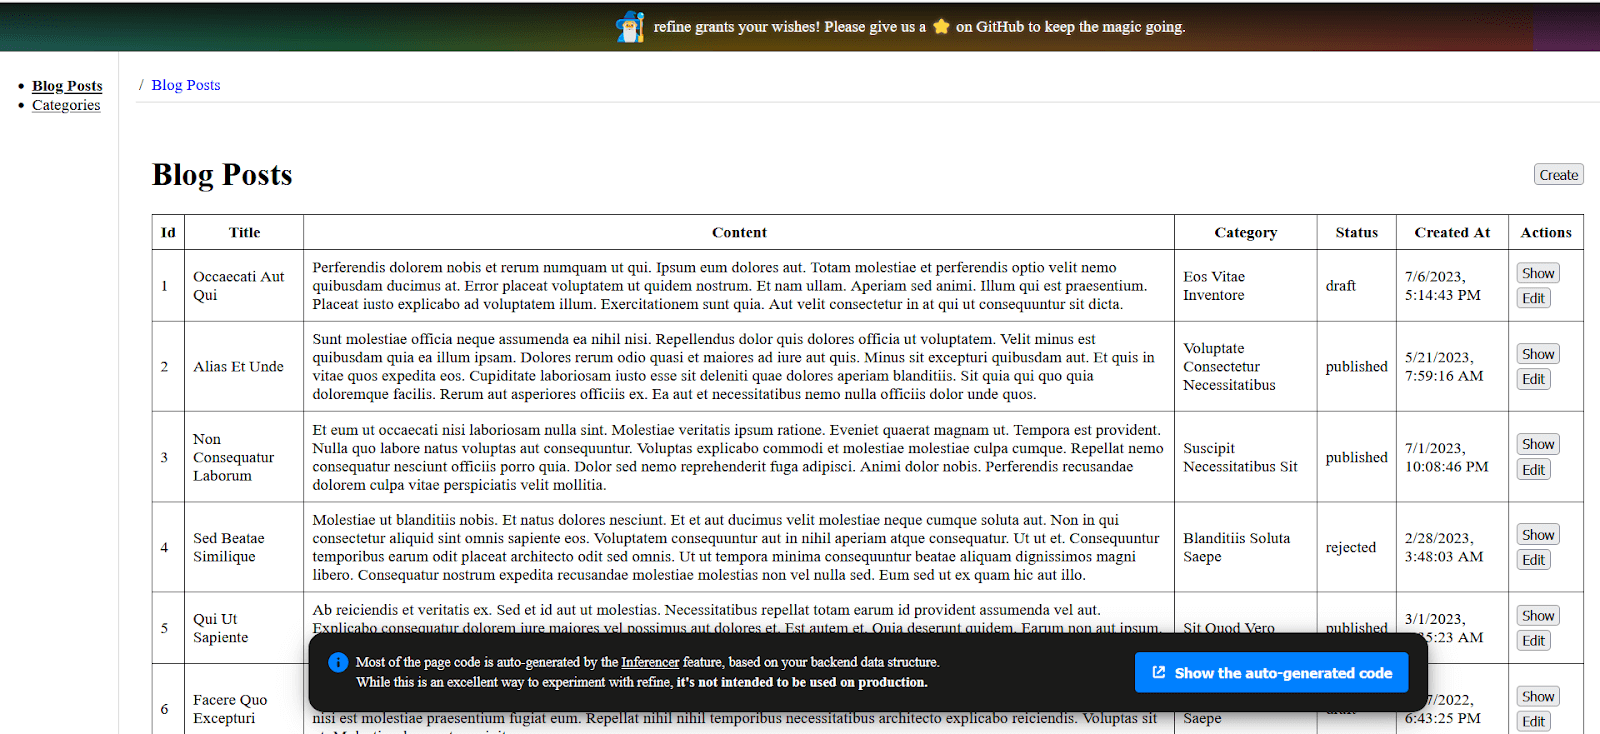
Upon successfully starting the development server, navigate to http://localhost:5173 on your browser of choice. Your project should render as shown in the image below.

What is Refine notification provider
The Refine notification provider is a feature that enables the display of notifications to users within a Refine application. The primary purpose of the notification provider is to centralize the management of notifications, making it easy to display different types of notifications, such as “success”, “error”, and “progress”, to users from different parts of the application.
To understand how the notification provider works, we first need to comprehend how it interacts with the application. For every design system you choose to use in your Refine application, whether it's Ant Design, Material Design, Mantine, or Chakra UI, Refine provides a built-in notification provider that is passed as a prop to the Refine component.
import { useNotificationProvider } from "@refinedev/antd";

return (
  <Refine
    //...
    notificationProvider={useNotificationProvider}
  />
);
The code above uses Refine's built-in notification provider for Ant Design. When a notification is triggered, Refine will use the notification provider to invoke the Ant Design notification object and display notifications in the application. The same goes for the highlighted design systems.

The notification provider is an object with open and close methods, which Refine uses to show and hide notifications.
const notificationProvider = {
  open: () => {},
  close: () => {},
};
The **open** and **close** methods
The open method is invoked when Refine needs to send a notification and provide feedback on users' actions in the application.
The method takes an object argument with several properties that are used to set the message, description, type, and a unique key for the notification. The predefined abstract type below illustrates the properties available to the open method.
interface OpenNotificationParams {
  key?: string;
  message: string;
  type: "success" | "error" | "progress";
  description?: string;
  cancelMutation?: () => void;
  undoableTimeout?: number;
}
The key, message, and type properties are the only required properties of the group; the rest are optional. The message and type properties accept the respective notification message and type from Refine, while the key property accepts a unique ID that helps Refine identify active notifications and prevents it from displaying duplicate notifications.
export const notificationProvider = {
      open: ({ key, message, type, undoableTimeout, cancelMutation }) => {
       ...
      },
   };
Unlike the open method, the close method only takes a key argument, which contains the unique ID of the active notification.
export const notificationProvider = {
      ...
      close: (key: any) => toast.dismiss(key),
    };
The close method uses this unique ID to terminate or dismiss the toast notification when the set duration has elapsed.
The **useNotification** hook
The useNotification hook is a special function that allows you to manually invoke notifications anywhere in a Refine application. It exports the open and close methods from the notification provider, which allows you to show and hide notifications from any component.
const { open, close } = useNotification();

// Open notification
open({
  type: "success",
  message: "Success",
  description: "This is a success message",
});

// close notification
close("notification-key");
To learn more about the useNottification hook, please refer to the documentation page.
We'll see the open and close methods in action in the next section, as we explore how to create a custom notification provider Using the react-hot-toast library.
Create custom notification provider with react-hot-toast
The notification provider is not included in your Refine application by default, depending on your project's configuration. It is only set up in projects configured to use a select design system. Therefore, headless projects without a design system, such as the project we created earlier, use Refine's default notification provider, which does not add notification functionality to your application.
However, Refine provides the option to create custom notification providers with the React toast library of your choice. Using the notification provider object as a single source of truth, you can create a notification provider with any toast library in the React ecosystem. In this section, we will demonstrate how you can create one with the react-hot-toast library.
Install react-hot-toast
As a first step, open your IDE's command-line tool or use the built-in one on your machine, and cd to your project's directory. Next, run the following command to install the react-hot-toast library as a dependency for your Refine application:
npm install react-hot-toast
Set up a notification provider
To set up a custom notification provider, we'll begin by creating a dedicated file to house all of our notification provider's logic.
Inside the src directory, create a new folder and name it providers. You can choose any name you prefer, but it's recommended to use providers to maintain a coherent file structure.
Next, create a new file inside the newly created providers directory and name it NotificationProvider.tsx. Then, add the following code:
import React from "react";
import { NotificationProvider } from "@refinedev/core";

export const notificationProvider: NotificationProvider = {
  open: ({ key, message, type }) => {},
  close: (key: any) => {},
};
In the code above, we export a notificationProvider object with the open and close methods defined. Then we use the built-in NotificationProvider method type from Refine's core to validate the object's structure and add type safety to the methods.
This is what the NotificationProvider object type looks like under the hood:
interface NotificationProvider {
  open: (params: OpenNotificationParams) => void;
  close: (key: string) => void;
}
We have created a base for our notification provider. Next, we will examine how to integrate the react-hot-toast library into the provider.
Integrating react-hot-toast
As previously explained, the toast function invokes a toast notification when called. Therefore, we can declare it inside the open and close methods and pass it the necessary arguments from each methods.
This way, when Refine calls the open method, the toast method will be triggered, and a toast will be displayed on the screen. Similarly, when the notification time elapses, the close method is called, and the notification is removed.
Now, return to your code and update it with the following:
import React from "react";
import { NotificationProvider } from "@refinedev/core";
import toast from "react-hot-toast";

export const notificationProvider: NotificationProvider = {
  open: ({ key, message, type }) => {
    switch (type) {
      case "success":
        toast.success(message, {
          id: key,
          position: "top-right",
        });
        break;
      case "error":
        toast.error(message, {
          id: key,
          position: "top-right",
        });
      default:
        break;
    }
  },

  close: (key: any) => {
    toast.dismiss(key);
  },
};
Here, we import the toast function from react-hot-toast and declare it inside the open and close methods, with the message and key arguments passed to it.
Since the toast function's toast options don't include a type property that we can pass the type argument from the open method to, we use a switch statement to check the type of notification being invoked by Refine and chain the appropriate method to the toast function.
In the close method, however, we chain a dismiss method to the toast function and pass it the key argument. This method uses the key to identify active toast notifications and terminates them when the close method is called.
After completing the steps above, your NotificationProvider.tsx file should look as follows:
import React from "react";
import { NotificationProvider } from "@refinedev/core";
import toast from "react-hot-toast";

export const notificationProvider: NotificationProvider = {
  open: ({ key, message, type }) => {
    switch (type) {
      case "success":
        toast.success(message, {
          id: key,
          position: "top-right",
        });
        break;
      case "error":
        toast.error(message, {
          id: key,
          position: "top-right",
        });
      default:
        break;
    }
  },
  close: (key: any) => {
    toast.dismiss(key);
  },
};
To complete the setup, we'll add the newly created notificationProvider object and the <Toaster/> component from react-hot-toast to the Refine context via the notificationProvider prop and the route element on the <Refine> component.
To do this, open the App.tsx file and make the following modifications:
...
    import { Toaster } from "react-hot-toast";
    import { notificationProvider } from "./providers/notificationProvider";


    function App() {
      ...
      return (
        <BrowserRouter>
            <Refine
              ...
              notificationProvider={useNotificationProvider}
              i18nProvider={i18nProvider}
              ...
            >
              <Routes>
                <Route
                  element={
                    <Layout>
                      <Outlet />
                      <Toaster />
                    </Layout>
                  }
                >
                ...
                </Route>
              </Routes>
              <UnsavedChangesNotifier />
            </Refine>
        </BrowserRouter>
      );
    }
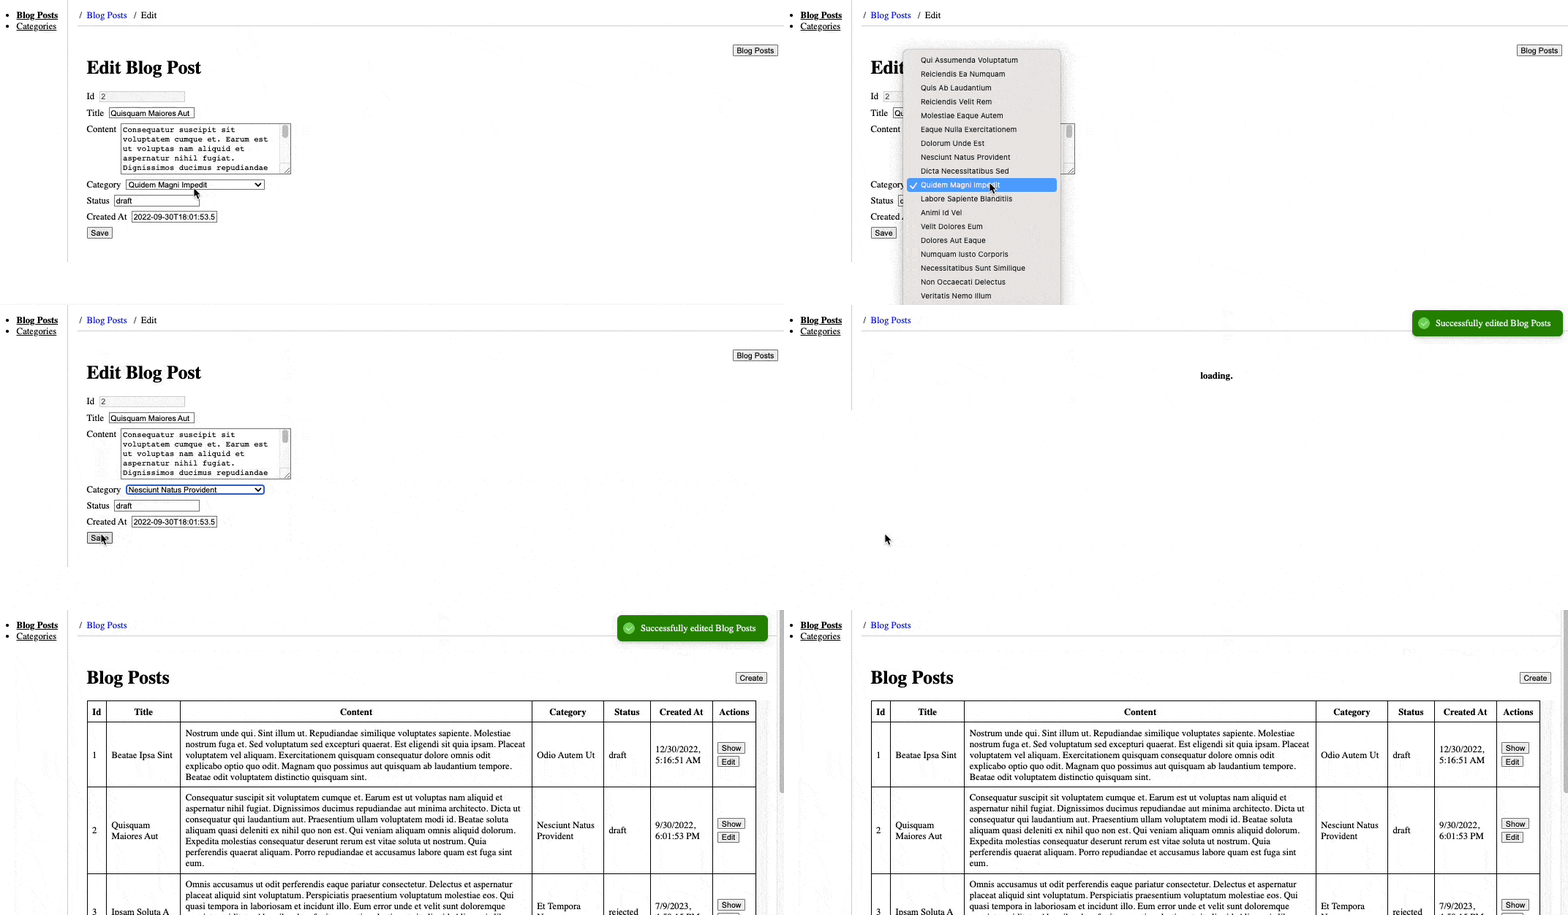
Congratulations! You have successfully created a custom notification provider for your Refine application. You can now preview your notification by editing or creating a record on the dashboard.
Success notification

Positioning your toast notifications
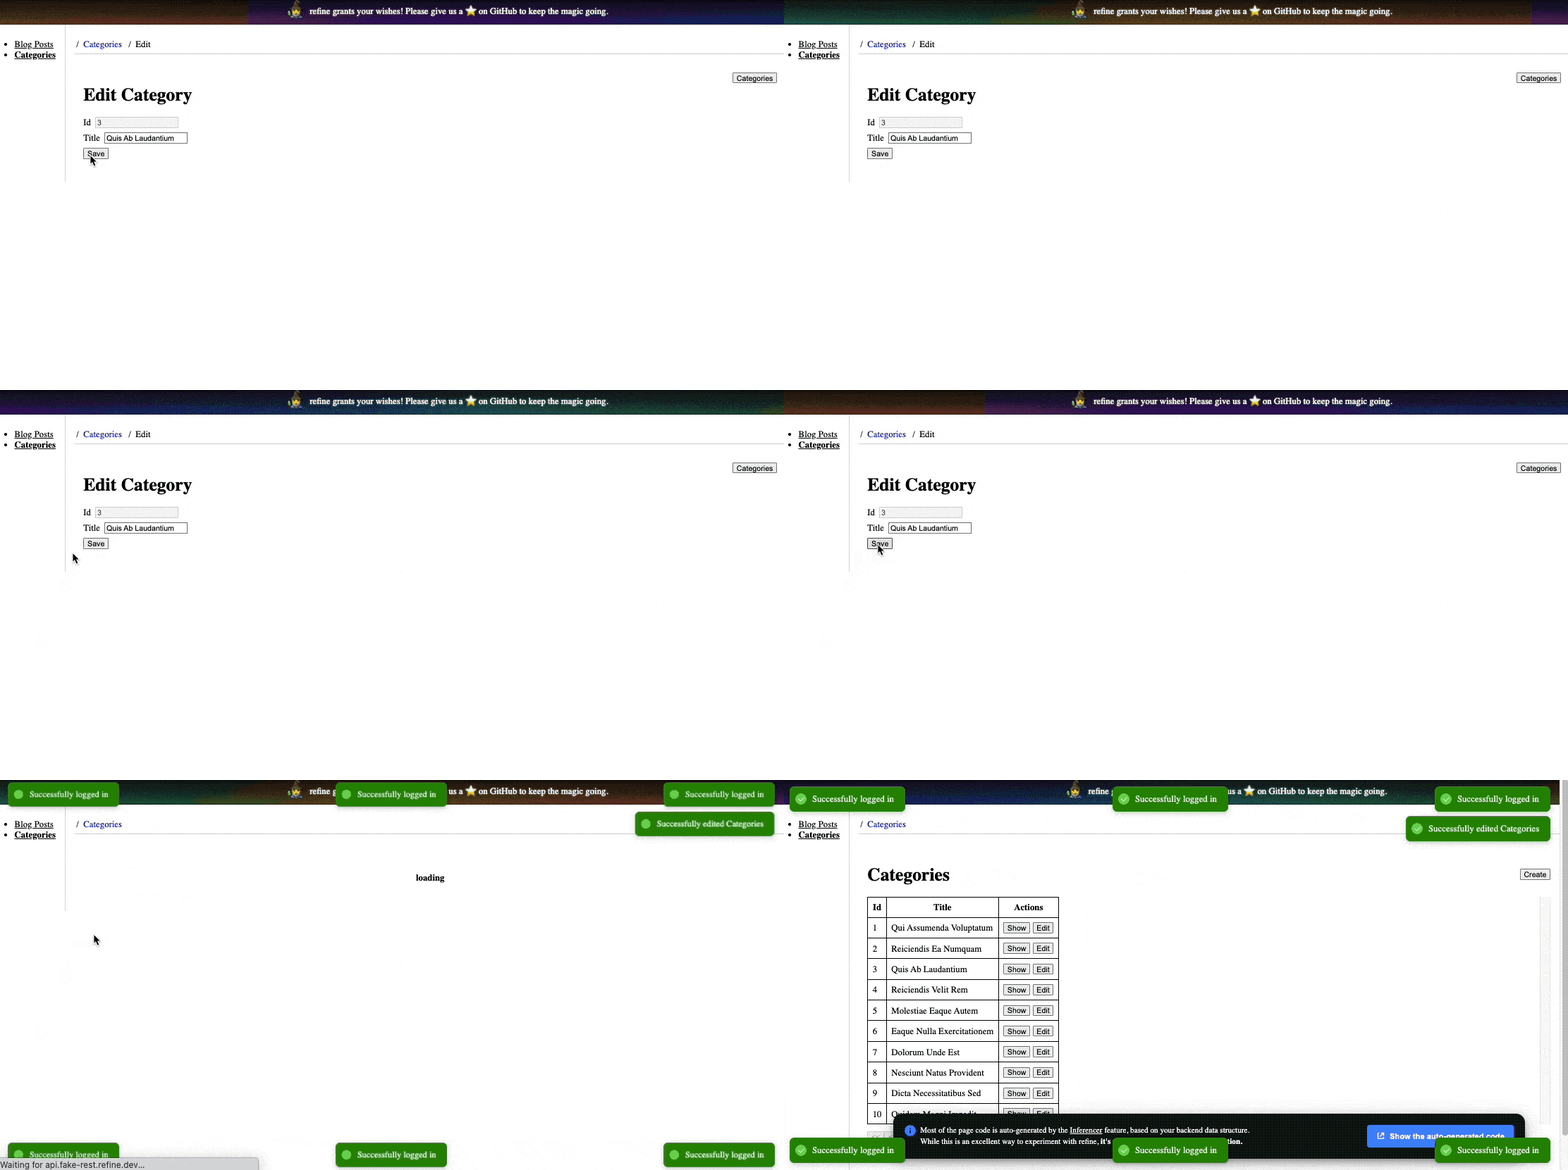
React Hot Toast lets you easily pick where you want the toasts to show up on the screen. It has six ready-to-use spots, but you can also set your own spot using the 'position' setting.
toast.success("Successfully logged in", {
  position: "top-left",
  style: {
    background: "green",
    color: "#fff",
  },
});

toast.success("Successfully logged in", {
  position: "top-center",
  style: {
    background: "green",
    color: "#fff",
  },
});

toast.success("Successfully logged in", {
  position: "top-right",
  style: {
    background: "green",
    color: "#fff",
  },
});

toast.success("Successfully logged in", {
  position: "bottom-left",
  style: {
    background: "green",
    color: "#fff",
  },
});

toast.success("Successfully logged in", {
  position: "bottom-center",
  style: {
    background: "green",
    color: "#fff",
  },
});

toast.success("Successfully logged in", {
  position: "bottom-right",
  style: {
    background: "green",
    color: "#fff",
  },
});

Accessibility Considerations
I wanted to bring forward some accessibility considerations about our toast notifications so they are easy to be used by everyone. Here are a few key points, with examples:
Screen Reader Support
We need to make sure that our notifications are accessible via screen readers. We can use ARIA roles and live regions to announce notifications.
import { toast } from "react-hot-toast";

toast.success("Operation successful!", {
  ariaProps: {
    role: "alert",
    "aria-live": "assertive",
  },
});
Keyboard Navigation
The users should be able to interact with notifications via their keyboards. In fact, we can provide a control within the notification, which is focusable, that when activated using the Enter key can be dismissed.
toast((t) => (
  <div>
    Operation successful!
    <button onClick={() => toast.dismiss(t.id)} aria-label="Dismiss">
      Dismiss
    </button>
  </div>
));
Contrast and Visibility
We have to be sure that the text in the notifications has a good contrast with the background for easy readability. We can do this by using high contrast ratio colors.
toast.success("Success!", {
  style: {
    background: "#333",
    color: "#fff",
  },
});
Non-Intrusive Design
Notifications should be simple and not get in the way of what the user is doing. We can even make it possible for the user to get rid of notifications or to turn off notifications in their entirety.
toast("This is a non-intrusive notification.", {
  duration: 4000,
  position: "bottom-right",
});
Dismissing React Hot Toast Notifications
We can make toast notifications go away by setting a time or using the 'dismiss' button. To use this button, you need the toast's special ID or the toast itself. You usually get the toast when you show the notification. To get rid of one toast, use the 'dismiss' function with its ID. To get rid of all toasts, just use the function without any ID.
Testing React Hot Toast Notifications
It's very important that toast notifications work across many scenarios. So, my simple approach toward testing toast notifications in a React application would be:
Check Display
Confirm that the toast notification is displayed upon trigger. This is generally concerned with ensuring that, when triggered, the screen can display the toast message.
const toastMessage = "This is a test toast";

toast(toastMessage);
expect(screen.getByText(toastMessage)).toBeInTheDocument();
Test Different Types
Verify different types of toast messages (for example, success, error) to be of the correct style and message.
toast.success("Success message");
expect(screen.getByText("Success message")).toHaveClass("toast-success");

toast.error("Error message");
expect(screen.getByText("Error message")).toHaveClass("toast-error");
Positioning
Place the toast at the correct position on the screen (e.g., top-right, bottom-center).
toast("Position test", { position: "top-right" });

expect(screen.getByText("Position test")).toHaveStyle({
  position: "absolute",
  top: "0",
  right: "0",
});
Auto Dismiss
Make sure that the toast vanishes after a given period of time if set as auto-dismiss.
jest.useFakeTimers();

const toastId = toast("Auto-dismiss test", { duration: 3000 });
expect(toast.isActive(toastId)).toBeTruthy();

jest.advanceTimersByTime(3000);
expect(toast.isActive(toastId)).toBeFalsy();
Manual Dismissal
Verify that the toast can be manually dismissed by a user or programmatically.
const toastId = toast("Dismiss test");

toast.dismiss(toastId);
expect(screen.queryByText("Dismiss test")).toBeNull();
Conclusion
As demonstrated in the article, Refine abstracts the overhead complexity involved in building system-wide customizable notification systems in React applications. Given its robust functionalities and the highly customizable nature of the react-hot-toast library, you can improve on what’s covered in this tutorial, or better yet, use any of the design systems with their built-in notification systems.
Live CodeSandbox Example
npm create refine-app@latest -- --example blog-react-hot-toast

